Explore a detailed, step-by-step guide on Azure AD app registration for Dynamics 365 CE Online. Learn how to securely register your custom app, ensuring smooth integration with our comprehensive tutorial. Looking to seamlessly connect your custom app with Dynamics 365 CE Online? You can achieve this by performing Azure AD app registration. In this user-friendly guide, we'll take you through the process step by step, ensuring your app securely integrates with your Dynamics 365 CE Online instance. Let's dive in!
Understanding Azure AD App Registration
Before we jump into registration, let's
briefly understand what Azure AD app registration is and why it's crucial for
your Dynamics 365 CE Online integration.
Azure AD app registration allows you to
specify how your app verifies and communicates with Azure AD and other
Microsoft services. Registering your app establishes trust between your
application and Azure AD, ensuring safe access and data sharing.
Prerequisites
Before you start, make sure you have:
- An Azure AD Account: You'll need an Azure AD
account with sufficient permissions to register apps.
- Access to Dynamics 365 CE Online: Ensure you can
configure your app to work with your Dynamics 365 CE Online instance.
To
register an app in Azure Active Directory, you must follow these steps.
Step
1: Go to https://portal.azure.com/
Step
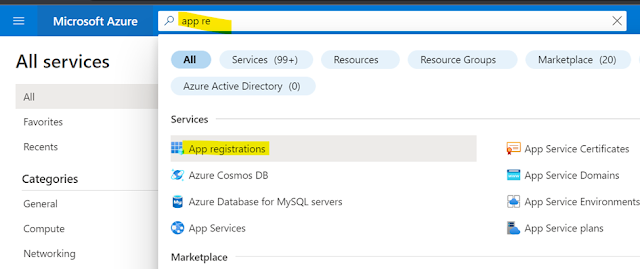
2: Search for Application Registration
Click
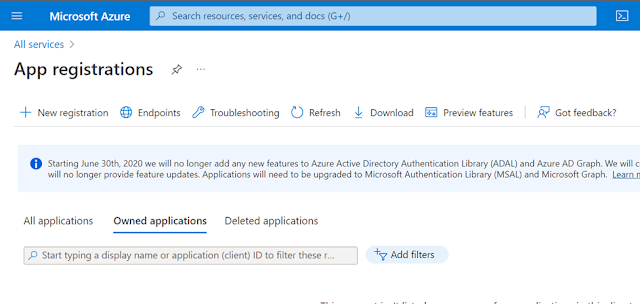
the App registration and you will see the following screen.
Step
3: Click New Registration
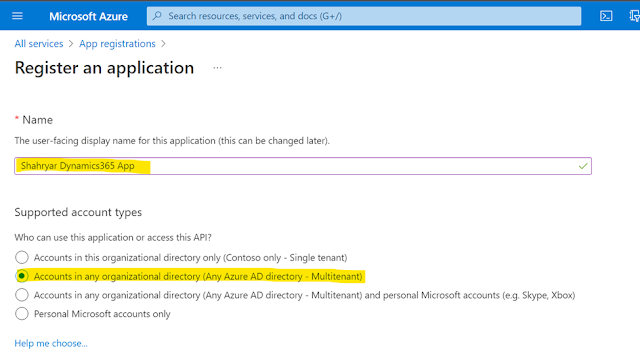
Step 4: Githe ve application a name and select the supported account type. In my case, I have selected the Accounts in any organizational directory (Any Azure AD directory - Multitenant). It is just for that who can use the application or access this API.
Step 5: You can skip the Redirect URI option and click
the register button
After the registration you can see the details like
Application Client ID, Object ID, Tenant ID
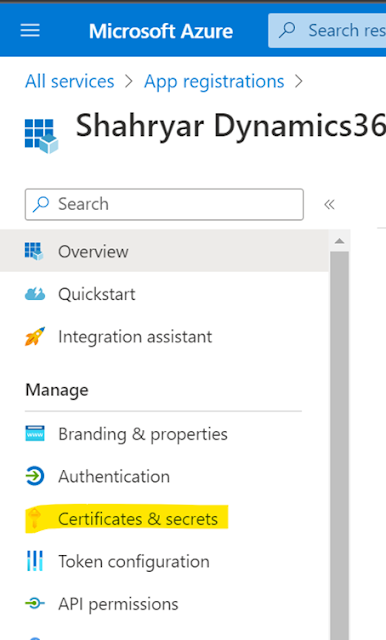
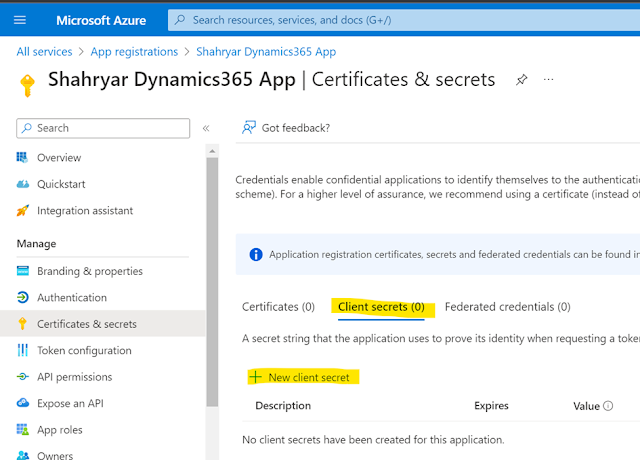
Step 6: Now go to the Certificates & Secrets
Step 7: Click on New Client Secret
A dialog box will appear.
Step 8: Give a description of the client’s secret and
duration and click add button.
Client secret is created successfully.
You can copy and paste the values to some safe place because
they will be hidden after some time.
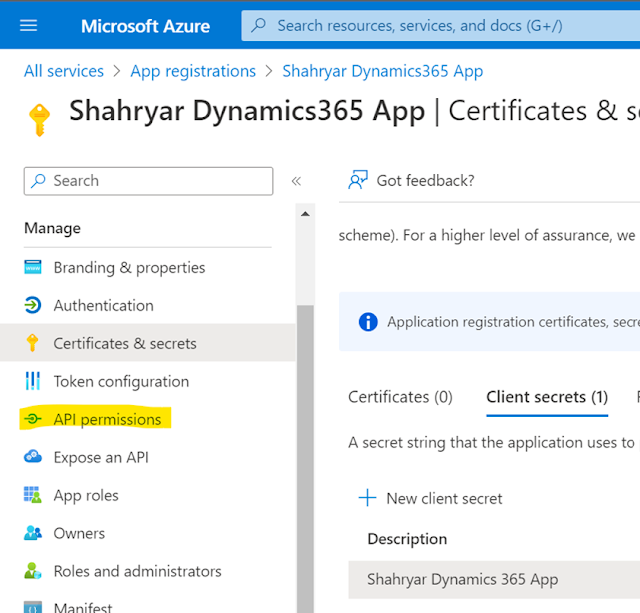
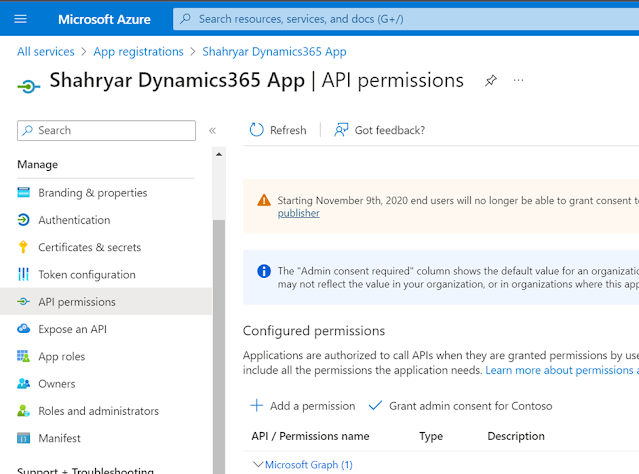
Step 9: Coming to our next point, go to the API
permissions
You will see the following screen
Step 10: Click on Add a permission
Request API Permission dialog box will open
Step 11: Click on Dynamics CRM option
Click on Delegated Permissions
Select user_impersonation and click add permissions
button
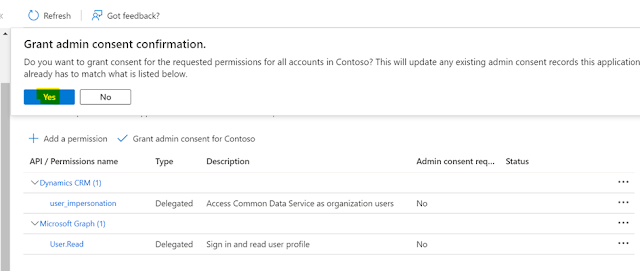
Step 12: Click on Grant Admin Consent
Click on Yes.
Admin consent confirmation is granted.
Stay tuned very little is left.
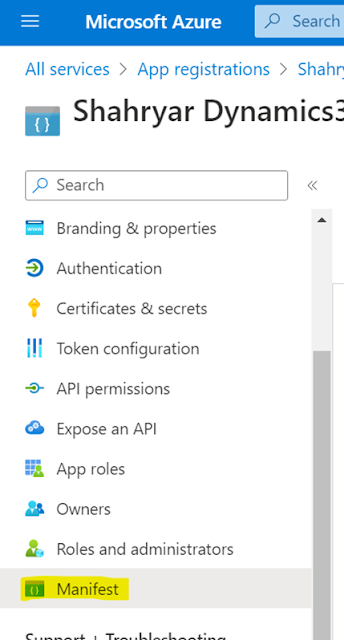
Step 13: Go to the Manifest
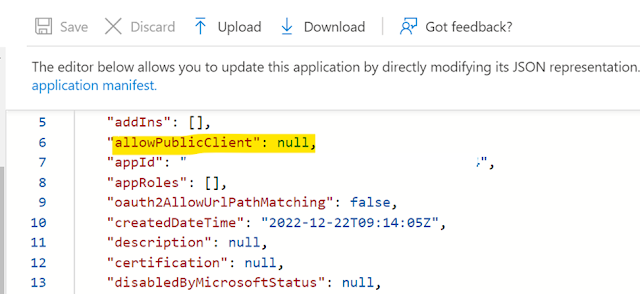
Step 14: Now we have to update allowPublicClient to true and oauth2AllowImplicitFlow to true.
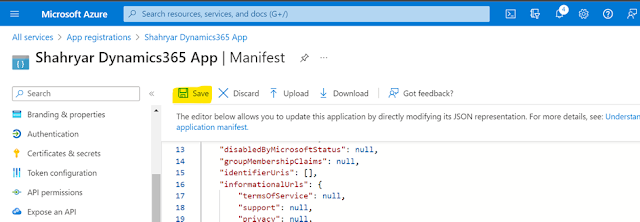
Save the Manifest
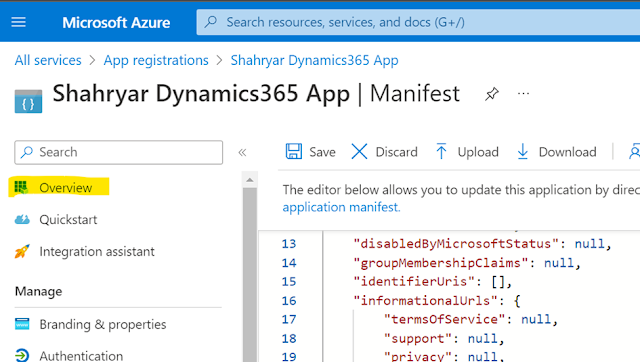
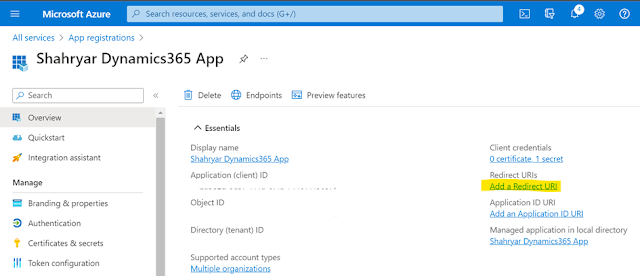
Step 15: Go to Overview
Step 16: Add a redirect URI
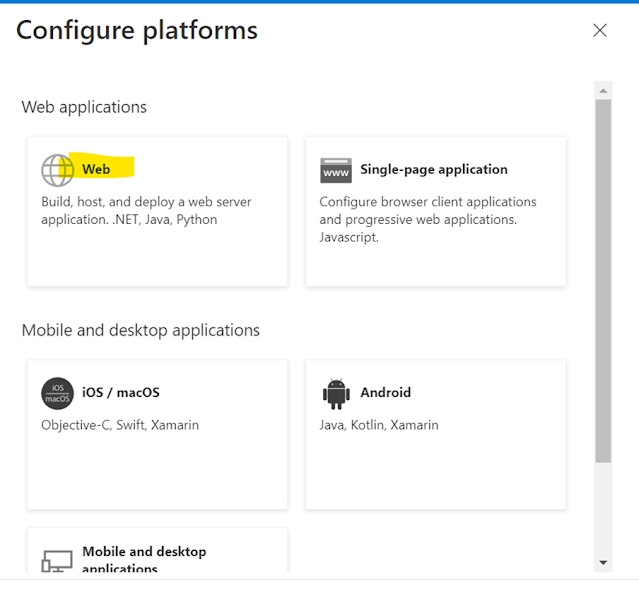
It will ask you to add a platform. Click on add
platform.
In Configure platform dialog box, click on the web.
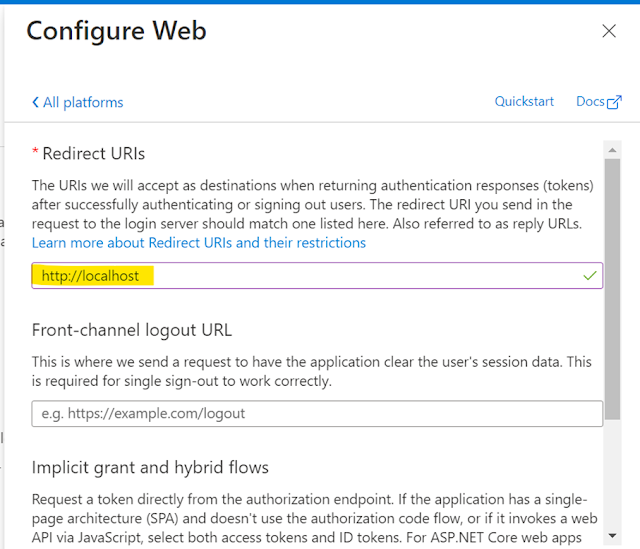
Provide URI. For Development, you can provide the URL
as http://localhost under Redirect URIs.
Select Access tokens (used for implicit flows)
and click configure button.
URI is added
So, this was the final step. Now you have finally configured the App in Azure Active Directory. If you want to read about the benefits of using the Azure AD app then you can read here why we create an app in the Azure Active Directory.
Conclusion
Congrats! You've successfully
completed Azure AD app registration, setting the stage for a seamless
integration with Dynamics 365 CE Online. This straightforward guide equips you
with the knowledge needed to securely configure your app for accessing and interacting
with your Dynamics 365 instance.
Remember to follow Azure AD app
registration best practices and define app permissions for a secure and
efficient integration.
By following these steps,
you're on your way to unlocking your custom application's full potential within
the Dynamics 365 CE Online environment. Happy integrating!
Note:
Always keep your app registration details and secrets secure to protect your
application
FAQS
1. What is
Azure AD app registration for Dynamics 365 CE Online?
Answer: It's the process of configuring your app
to securely integrate with Dynamics 365 CE Online through Azure Active
Directory.
2. Why is
Azure AD app registration important?
Answer: Ensures secure access and data exchange
between your app and Dynamics 365 CE Online.
3. What
are the prerequisites for app registration?
Answer: You need an Azure AD account and access
to your Dynamics 365 CE Online instance.
4. How can
I grant admin consent for my app in Azure AD?
Answer: In your app registration, click
"Grant admin consent for [your organization]" under "API
permissions."














0 Comments
Thanks for commenting. Your comment will be live soon after approval.